26 May 2011

HEADER TYPES

Backing Board
Folded Header
Shaped Header

(All done in cardboard, stuck with double sided tape and held together with a metal ring)


DO NOT WANT TO SEE
  • Staples
  • Normal Paper, use thick card around 300gsm

TOOLS
  • Ruler
  • Double Sided Tape
  • Fabric
  • Masking Tape
  • Headers
  • Scissors
  • Scalpul
  • Cutting Mat
  • Butter Knife


Before folding header score with the blunt end of a butter knife.


 MEASUREMENTS
(Normal Folded Header)

A5 SIZE
15cm X 10cm (5cm thickness each half

We must:
  • Add 1cm to prevent overlap
  • Add 2mm to fromt 
  • Deduct 2mm from back

So Measurement will become 16 X 10 (5.2 Front, 4.8 Back)


CREATE IN PHOTOSHOP
  • Background Layer
  • Text Layer
  • Crop Point Layer

WEEK 12 CLASS NOTES

RENDERING IMAGES

Sometimes easier to render garments seperately. It is however, up to us whether we draw our figures with or without garments for this subject. Remember that when scanning our images, it is important to ensure that there are no gaps in the line to make colour easier to fill!

When we scan our images, the black line can sometimes appear a grey/green. We can revert these lines back to black by doing the following:

  1. Image Adjustment
  2. Adjust Brighhtness/Contrast
  3. Magic wand (select all white in image) 
  4. Contigeous Off
  5. Delete

To make the Outline a TRUE BLACK
  1. Select Inverse (this will select the black)
  2. Edit
  3. Fill
  4. Foreground Colour
  5. OK
  6. Name Layer-Black Outline

When using black fabric, we need to use a light coloured outline (preferably a light grey). We can create this in the same manner as for the black outline.

  1. Magic Wand
  2. Edit
  3. Duplicate Layer-Light Outline

On Light Outline Layer:
  1. Select Black
  2. Select Colour
  3. Edit
  4. Fill
  5. Foreground Colour
  6. OK


RENDERING FABRIC

Dropping Fabrics into Garments-Creating movement around the body

For each Fabric:
  1. Scan in Fabric Manipulation
  2. Edit
  3. Define Pattern
  4. Name Patterns

Filling Image:
  1. Create New Layer
  2. Select All
  3. Edit
  4. Fill
  5. Find Pattern and Select

Chaning Scale of Fabric:
  1. Transform (Command T)
  2. Reduce scale to 50% (The fabric will not cover the whole layer)
  3. Copy and paste pattern to cover page.
  4. Merge all fabric layers together

NOTE: A quick way to copy and paste is to do the following ALT, Click, Shift, Drag. If fabrics are being used in other garments simply duplicate the merged fabrics layers to save time later on.

Moving fabric to appear cut on the bias ETC
  1. Rectangular Marquee
  2. Select are
  3. Edit
  4. Transform (comand T)
  5. Click to rotate


CUTTING OUT
This is now ready to cut out. 

On the Outline Layer
  1.  Select area using magic wand (contigeous ON)
On the Fabric Layer
  1. Select
  2. Inverse
  3. Delete

The area should now be filled


WARPING FABRIC
This is done to make the garment look more realistic. Warping Fabrics create movement around the body. To do this:

Working on the Fabric Layer:
  1. Rectangle Marquee
  2. Select Area
  3. Edit
  4. Transform
  5. Warp
  6. Move the grid until you are happy with the warp
  7. OK
  8. Cut Out

OVERLAYING FABRIC
  1. Magic Wand
  2. Select Area
  3. Select
  4. Inverse
  5. Cut Out (The areas should now be filled)
  6. Repeat for the Overlay Fabric
  7. Change the Opacity to achieve desired effect


LIGHT & SHADE
Use the dodge and Burn tool to create light and shade throughout the garment.
(Refer to Week 11 Class Notes)


ONCE ALL RENDERING IS COMPLETE, MERGE ALL FABRIC LAYERS, KEEPING OUTLINE SEPERATE

Sometimes the Outline doesnt match up with the fabric fillings and White space cam appear when printing. To avoid this, it is a good habbit to fill the outline with an underlay of fabric. To do this:

  1. Turn ANY Fabric Layer ON
  2. Go to Outline Layer
  3. Magic Wand
  4. Select outside of skirt
  5. Delete from Fabric Layer
  6.  

MERGE LAYERS (NOT OUTLINE) and DUPLICATE so that further rendering can be done if needed.
MERGE ALL LAYERS for the other skirt.

25 May 2011

WEEK 11 HOMEWORK

INTERESTING LAYOUTS

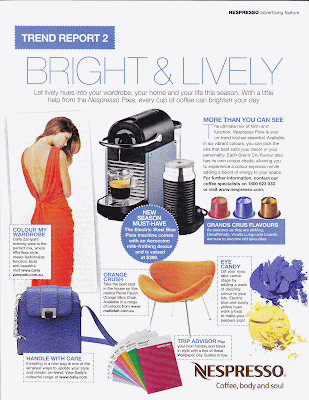
Below are THREE magazine layouts that I find interesting. Amoung these three layouts is one photograph that I have included for easy reference for Assessment 3-Range Boards. I believe the two page layouts below are both aesthetically pleasing for their use of colour and balance.


This layout has a significantly romatic and feminine feel to it. This mood has been created through the use of soft colours and simple imagery. The balance of text and imagery do not clutter the page, instead balancing the layout perfectly.
 
This layout is similar to the first, in that the text and imagery used balance each other and create an aesthetically pleasing layout. This layout is edgy, consisting of bright boarders, cropped images and slanted photographs to make the page stand out
.
 
This photograph stood out to me for its unusual use of proportion. Unlike the typical fashion photograph (in which we see the model/figure take up the entire frame), the white building instead maintains a dominate role here. While this building holds a large proportion of the frame, it also frames the model beautifully- a point of which really appealed to me upon viewing this image.


NOT SO INTERESTING LAYOUTS

Below are THREE magazine layouts that I find not so interesting. These images need not be analysed individually, as they are all similar in aspects I do not find appealing. Although all the images used in this post have been pulled from the same magazine (Marie Clare) these images feel so commercial to me, and not to the high standard seen in the above images. The cropping and placement of images seem somewhat random, and the positioning of the text in relation has not been thought out in regards to their aesthetic appeal. 

Similaraly I have included a photograoh amoung these layouts. It is the polar opposite to the above fashion photograph in that it is the epitomy of the tyoical fashion photograph. The sterile, face on stance of the model is not appealing to me, while the boring muted colours featured in the styling of the outfit clash with the dull tone of the background.


RANGE BOARD ASSIGNMENT

ASSIGNEMENT- Range Boards
DUE DATE: 14 June
WEIGHTING: 50%


THIS ASSIGNMENT WILL INVOLVE CREATING SEVEN BOARDS

1. Title Board
2. FIVE Skirt Boards
3. Range Overview Board


TITLE BOARD
  • Name of Range
  • Collection Type (Daywear, Beachwear etc)
  • Season (Spring/Summer, Autumn/Winter)
  • Name and Label Name

5 SKIRT BOARDS
  • Technical Drawing of Skirt (Front, Side and Back View)
  • Range Drawing of Skirt
  • Description
  • Garment Name and Style Number (Eg. Tension SK.01)
  • Textile Swatches (Indicate Fabric Type)

RANGE OVERVIEW BOARD
  • 5 figures coloured in (put basic singlet top on models)
  • Title up top

FABRIC FEELERS (A5 SIZE)
  • Fabric Manipulations (Fabric Type, Fibre Content, Fabric Name, Care Instructions)
  • Trims and Accessories (Name Trims and Accessories)

NOTE: Use masking tape or pinking shears to give a neat edge or overlock in matching colour

WEEK 11 CLASS NOTES

BASIC FIGURE RENDERING
  1. Draw by hand and scan into the computer
  2. No faces
  3. Add shoes
  4. After scanning we have to get rid of the white. To do this;
  5. Duplicate Layer
  6. Select area using magic wand
  7. Turn contigeous off
  8. Name layer for your outline 
     (DO NOT WORK ON THIS LAYER)


FILLING WITH COLOUR
  1. Create new layer (skin tone)
  2. Pick Colour
  3. Select inside of the outline on OUTLINE LAYER:
  4. Go back to outline layer
  5. Turn contigeous ON
  6. Select area you want to colour
  7. Go back to SKIN layer
  8. Select Fill


MAKING MODEL LOOK 3D
(Think about your light source, direction etc)
  1. Go to Dodge Tool
  2. Select Brush (in this case, the Airbrush)
  3. Adjust Exposure (in this case make it light)
  4. With your selection on Start to go around the figure to create the impression of light

NOTE: If you want to make it darker
  1. Select the burn tool (Option in Dodge tool)
  2. Select Brush and Adjust exposure
  3. With Selection on, go around the figure to create shade.


BASIC RETOUCHING
Removing items from image (Straps. Glasses etc)
  1. Duplicate Image
  2. Zoom into area
  3. Select Clone Stamp Tool
  4. Adjust diameter to a suitable size
  5. Select the part you want to clone. To do this:
  6. Hold down ALT key (this will turn brush into target)
  7. Click to select
  8. Hover this selection over the item you want to erase and click
  9. Repeat for the entire image re-selecting colours where necessary

To Smooth Area:
  1. Click on droplet (blur tool)
  2. Slect Smudge Tool
  3. Use it to blend this area

For a Subtle Duplicate:
  1. Healing Brush Tool
  2. Press ALT to clone area
  3. Click down to create a subtle duplicate of this area
  4. NOTE: you can use this tool the same as the clone stamp and blur tools.

WEEK 10 HOMEWORK


12 May 2011

WEEK 10 CLASS NOTES

USING BRUSHES TO CREATE A SPRAY EFFECT

It is easier to use an image with two colour, as this will make it easier for us to use our magic wand.
If you use an image that is tonal we must strip it back first. 
To do this, create a stencil by:

  1. Opening image
  2. Windows
  3. Levels. Move the levels around until you achieve a stencil (usually have to be moved into the middle)
  4. Select area you want to spray
  5. Create a New Layer (This is the layer you will work on)
  6. Go to Brushes
  7. Select 'Air Brush'
  8. Alter Tranperecncy and Flow
  9. Pick Colour
  10. Spray in your selected area
  11. Turn off background layer to see your stencil.

WEEK 10 CLASS NOTES

CREATING A BRUSH

  1. Find Image OR Scan in your own embellishments (beads, buttons, sequins etc)
  2. Bring up in photoshop
  3. Select what you want to use with marquee tool and cut or copy

    SELECTING BRUSH AREA
    1. New File
    2. Resolution 100% (or same resolution you scanned at)
    3. Paste the object
    4. Remove any white areas using the majic wand and delete
    5. Depending what your image is like, you may need to make small adjestments to the brightness, contrast etc. You can do this using the LEVELS.

    We can add effects to these areas. In the example of a sequin, we can add sparkle to the brush. 

    To do this:
    1. Go to Filter
    2. Render
    3. Lens Flare
    4. Move the cross around the image to select where you want to create the flare from
    5. Adjust the brightness to give you the desired effect you are after.

    MAKING THE BRUSH
    1. Define brush preset
    2. Name the brush.

    USING THE BRUSH 
    (The brush is in black and white but still maintian the tones etc of your original image)

    1. Window
    2. Brush menu
    3. Scroll through to find your brush and select. You can alter the size and opacity of your brush in this window) 
    4. Chose a colour from your swatches and your ready to use the brush!

    SAVING BRUSHES
    1. At the bottom of the brush box, select the middle icon (Preset Manager) 
    2. Select the brushes you want to save 
    3. Save Set (or File depending on how many you are saving) onto desktop 
    4. Then all you need to do is click on them to load them into photoshop.

    TO ADD STITCHING TO YOUR IMAGE
    1. Rectangel Tool
    2. Line Tool
    3. Using bar at top of window select pixels, colour and weight of the line

    ADDING SHADOW
    1. Effects (located at the bottom of the layer tab)
    2. Layer Style
    3. Select drop shadow